Recording a Macro
SmartCAM contains a built-in macro recorder. The recorder creates a macro by capturing SmartCAM functions and parameter variables, as you run the application. When the macro is played back, it will reproduce the steps you recorded and create an exact replica of the changes made when it was recorded.
Recording a macro, as you use SmartCAM, is a good way to start a new macro. It captures the major steps you took. After recording is complete, you can edit the macro contents to add the functionality that you would like to include. For example, creating simple macros that set the current view to a commonly used pre-defined view. When created, these view macros can be assigned to SmartCAM hotkeys for quickly switching between views. Assigning macros to hotkeys and the toolbar is covered later, in the Creating a User Interface section.
Recorded macros have a .mcl file extension.
A Simple Macro
The following explains how to record a simple macro and then use the macro.
Before starting any macro, it is a good idea to understand what the goal of the macro is; this way you know what steps are needed. This tutorial macro will simply change the display to the ISO view.
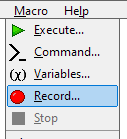
Step One: Record the Macro
From the SmartCAM menu, choose Macro - Record. In the Macro: input enter the full path and filename for the macro to be recorded. Use the filename "ViewISO.mcl".
For purposes of the tutorials, it might be a good idea to create a temporary subdirectory
on your computer simply to hold the tutorial macros. For example: C:\MACROS\. In
this instance, the path and filename used for this macro is: C:\MACROS\ViewISO.mcl
Press Accept to start recording the macro. Most SmartCAM operations, from this point are recorded in the macro. Also notice that while the macro is being recorded, a box is drawn around the Macro main menu entry. This is a visual cue that a macro is being recorded.
Useful Tips
Do not use hotkeys while recording a macro, they are not recorded in the macro. Instead use the View menu functions.
Step Two: Change the View
Select View - Get View. When the Get View dialog box is display, select ISOfrom the list of predefined views.
Step Three: Stop Recording
After selecting the ISO view, the goal for this macro is complete. Use Macro - Stopto end the macro recording. A message box pops up explaining that macro recording has stopped.
The macro is now ready to be used.
Step Four: Review the Macro code
Since this is an introductory tutorial, it might be helpful to see what SmartCAM has recorded as the macro. Using a text editor, such as Notepad, open the macro.
// Production_Milling ... Macro File
// c:\macros\ViewISO.mcl
// CREATED: 08/29/07
//
//
GET_VIEW[VN="ISO"]
The recorded macro starts with a header in comments. The header includes the version information
for the application used to record the macro. It includes the path and filename of the recorded
macro and the date recorded. After the comments begins the actual macro code. In this instance,
the simple macro contains only a single macro command; the GET_VIEW[] command.
No adjustments are needed for this macro, so close the text editor and return to your SmartCAM application.
Step Five: Run the Macro
Load a Process Model - any model should do.
Select Macro - Execute, from the SmartCAM menu. The default macro path and filename should be the path and filename of the macro just recorded. If not, use File Select and select the macro. Use the Accept button to close the dialog box and run the macro.
The view has changed to the ISO view. This macro is successful.
Helpful Macros
The above tutorial creates a macro that changes the current view. It is true, this macro replicates functionality already built into the SmartCAM applications; but it was just an example of how simple it is to create helpful macros in SmartCAM.
Extending this concept allows for a number of helpful macros. Perhaps a pair of macros are recorded that toggle several Display Mode options on or off. One set of display mode options are used when doing detailed work with the Process Model geometry. Another set is used when reviewing the results of the work or using Verification.
SmartCAM ships with hotkeys for toggling between the Top, Front, Right, and ISO views and this may be sufficient. However, some sites may have several other common view orientations that are used. If these view orientations are named and saved with the process models, macros could easily be recorded to switch between these views as well.
The above tutorial shows how simple it is to create a useful tool with limited effort. Subsequent sections will build on this experience and create more generic, more powerful macros.
Useful Tips
Do not remove Write permissions on your macro files. SmartCAM will be unable to use the file correctly if you do.
Related Topics