Macro Recipes
When writing SmartCAM macros, you often encounter a few activities. For some of these activities, how to accomplish the task is not always obvious. This Learning SmartCAM topic explains how to handle several of these tasks.
Working With Process Models
Some macros will require that a Process Model file be already loaded. It is easy for your
macro to check this. The macro function TOTEL() returns your model's total number of
database elements. To ensure a Process Model is loaded, run this function and verify that
return value is greater than zero (0).
Example:
//  Make sure a Process Model is loaded
IF (TOTEL() > 0)
	//  There is a Process Model loaded
	PAUSE[TX="A Process Model is Loaded."]
ELSE
	PAUSE[TX="No Process Model in memory."]
ENDIF
For more information on TOTEL() see the Status section of the Automation/Customization - MCL Reference -
Macro Functions reference.
Working With The Active Group
The macro command GRP() is used to query the active group. GRP()
is used in two different ways. When you use zero (0) as the function's parameter, it returns
the number of elements in the active group. When you provide a number greater than zero, it
returns that group item's element number.
To check to see if there is an active group, you use the first example. Use zero as the parameter and verify that the number of elements is greater than zero.
Example:
//  Check to see if there is an active group
IF (GRP(0) > 0)
	//  There is an active group
	PAUSE[TX="There is an active group."]
ELSE
	PAUSE[TX="No active group selected."]
ENDIF
For more information on GRP() see the Status section of the Automation/Customization - MCL Reference -
Macro Functions reference.
Use the GRP() macro function to get a count of the number of elements in the
active group.
When GRP() is called with zero (0) as the parameter, it returns the number
of elements in the group. When a non-zero, positive integer is used, the indexed element number is returned.
Example:
//	Display number of elements in group
PAUSE[TX="There are " + ITOA(GRP(0)) + " elements in the group."]
This macro will display a dialog box with the text, "There are # elements in the group." Where # is replaced with the number of elements.
If you run the macro with no active group, the number of elements will be -1. The
GRP() function returns -1 if there is no active group. You can clean up the sample
macro by using the following.
//	Display number of elements in group
INTEGER:#numElements = GRP(0)   //  Initialize variable with # of elements in active group

//  Check and see if there was a group. If not, set #numElements to 0
IF (#numElements < 0)
	#numElements = 0
ENDIF

//  Output message
PAUSE[TX="There are " + ITOA(#numElements) + " elements in the group." ]
The above example checks for a -1 value and replaces it with 0.
The ITOA(integer) macro function converts an integer into a string. This way,
the integer value can be concatenated into the rest of the output string.
For more information on the GRP() and ITOA()
macro commands, see the Status and String Manipulation Functions sections of the
Automation/Customization - MCL Reference - Macro
Functions reference.
Sometimes, you need to change the active group or eliminate it. However, when the macro ends, you want to restore the original active group. This can be easily handled by using Named Groups.
Somewhere near the top of the macro, prior to changing the active group, you give the current active group (the group that existed before running the macro) a name. After naming the group, you can change it as much as you need. Then, when you are finished, you can restore the original group and remove the name.
Example:
//  Preserve and Restore the active group
//  Useful variables
INTEGER:#activeGroup = 0	//  keep track of whether you need to restore the active group.
							//  default to 0 (No)

//  Check to see there is an active group before proceeding
IF (GRP(0) > 0)
	#activeGroup = 1	   //  there is an active group already

	//  Name the group
	NAME_GRP[GN="originalGroup", RM=0]

	//  clear the group
	NEW_GRP[]
ENDIF

//  The original group, if there was one, is preserved. Do what you need to do.

//  At end of Macro, if there was an original group then restore it
IF (#activeGroup = 1)
	//  there was an active group
	//  clear current group (just to be sure)
	NEW_GRP[]

	//  get named group
	GET_GRP[GN="originalGroup", AR=0]

	//  Remove the named group, no longer needed
	NAME_GRP[GN="originalGroup", RM=1]
ENDIF
For more information on the Named Group macro commands, see the Automation/Customization - MCL Reference - Macro Commands reference.
Some macros require the active group to be of a specific element type. To verify this, you will need to walk through the group and check each element's type.
For this you will use the GRP() macro function. When you provide a positive,
non-zero integer parameter, this function will return the element number of the element in
the group's indexed list of elements.
The TYP() macro function returns a value that returns the element type for
a specific element number.
Example:
//  Check and Make Sure Group All Lines
//
//  For this example, check and make sure all elements are Lines
//
//  Needed variables
INTEGER:#numElmts = GRP(0)	  //  get # of elements in group
INTEGER:#loopCounter = 1		//  initialize loop counter to one (1st element in group)

//  Make sure there is an active group, if not exit the macro
IF (#numElmts < 1)
	GOTO(DONE)
ENDIF

//  Loop through the group and check each element
//  The element TYP() for a line is 2
WHILE (#loopCounter <= #numElmts)
	//  check element type using TYP. If not a line, display a message and exit
	IF (TYP(GRP(#loopCounter)) <> 2)
		PAUSE[TX="Element " + ITOA(GRP(#loopCounter)) + " is not a LINE"]
		GOTO(DONE)
	ENDIF

	//  increment loop counter and check next element
	#loopCounter = #loopCounter + 1
ENDW

//  If you get here, all elements in group are Lines

@DONE
You can check for multiple element types using an
IF/ELSEIF/ELSE block and making various checks for different element
types. In that case, you would store the current element's type in a variable rather
than calculating it each time.
Here is a short macro fragment to touch on how this might work:
WHILE(#loopCounter <= #numElmts)
	#elementType = TYP(GRP(#loopCounter))

	//  Check for valid element type
	IF (#elementType = 2)	   //  Line
		...
	ELSEIF (#elementType = 1)   //  Point
		...
	ELSEIF (#elementType = 10)  //  Polyline
		...
	ELSE
		//   display an error
	ENDIF
For more information on the GRP() and TYP()
macro commands, see the Status and Properties of an Element sections of the
Automation/Customization - MCL Reference - Macro
Functions reference.
Working With Geometry
SmartCAM contains a macro function that will check if a profile is closed. You provide the element number of a piece of geometry in the profile, and the function will return 0 for not closed or 1 for closed.
Example:
//  Is selected profile closed
//
//  For purposes of this example, assume that the element the user picked to test with
//  is stored in variable #profElement

//  Check if profile is closed
IF (IS_CLOSED(#profElement) = 1)
	//  Profile closed
	PAUSE[TX="Profile is closed."]
ELSE
	PAUSE[TX="Profile is not closed."]
ENDIF
For more information on the IS_CLOSED() macro command, see the Properties of a Profile section of the
Automation/Customization - MCL Reference - Macro
Functions reference.
Often, a macro requires the User to specify an element number for a specific element type, such as a Line, Arc, Point, or Polyline. SmartCAM has a macro function that will return the element type based on a provided element number.
Example:
//	Return the element type of the selected element
//  Initialize variables
INTEGER:#elNum = 1
INTEGER:#elTyp = 0
STRING:#messageStr = "Element is a "

//  Prompt user to provide element #
PROMPT[TX="Select element to test", VN="elNum", SR=2, SC=50]

//	Make sure the provided element number is valid. It needs to be
//  greater than zero, and less than or equal to total number of elements in model
IF ((#elNum > 0) && (#elNum <= TOTEL()))
	//	get element type
	#elTyp = TYP(#elNum)

	//	Finish message string based on element type
	IF (#elTyp = 1)
		#messageStr = #messageStr + "Point."
	ELSEIF (#elTyp = 2)
		#messageStr = #messageStr + "Line."
	ELSEIF (#elTyp = 3)
		#messageStr = #messageStr + "Arc."
	ELSEIF (#elTyp = 4)
		#messageStr = #messageStr + "User Command."
	ELSEIF (#elTyp = 5)
		#messageStr = #messageStr + "Thread."
	ELSEIF (#elTyp = 7)
		#messageStr = #messageStr + "Ellipse."
	ELSEIF (#elTyp = 9)
		#messageStr = #messageStr + "Helix."
	ELSEIF (#elTyp = 10)
		#messageStr = #messageStr + "Polyline."
	ELSEIF (#elTyp = 12)
		#messageStr = #messageStr + "Cubic Spline."
	ELSEIF (#elTyp = 14)
		#messageStr = #messageStr + "Sub Call."
	ELSEIF (#elTyp = 15)
		#messageStr = #messageStr + "Groove."
	ELSEIF (#elTyp = 16)
		#messageStr = #messageStr + "Text."
	ELSEIF (#elTyp = 18)
		#messageStr = #messageStr + "Poly5x."
	ELSEIF (#elTyp = 21)
		#messageStr = #messageStr + "STL Facet."
	ELSEIF (#elTyp = 22)
		#messageStr = #messageStr + "Hole Pattern."
	ELSEIF (#elTyp = 23)
		#messageStr = #messageStr + "Region."
	ELSEIF (#elTyp = 25)
		#messageStr = #messageStr + "Hole Feature."
	ELSEIF (#elTyp = 50)
		#messageStr = #messageStr + "Surface."
	ELSEIF (#elTyp = 54)
		#messageStr = #messageStr + "Hole."
	ELSEIF (#elTyp = 58)
		#messageStr = #messageStr + "Container or Process."
	ELSE
		#messageStr = #messageStr + "Type Unknown."
	ENDIF

	//	Display element type
	PAUSE[TX=#messageStr]
ELSE
	PAUSE[TX="Invalid Element Selection."]
ENDIF
This sample macro first checks that the user-provided element number is valid and that it is between 1 and last element in model (TOTEL()). It then gets the element type classification integer and converts that to a string for output.
For more information on the TYP() macro command, see the Properties of an Element section of the
Automation/Customization - MCL Reference - Macro
Functions reference.
Manage Variables
It is always a good idea to add code to your macro that removes the variables you plan to use at the top of the macro. You remove the variables, then redefine them later in the macro as needed. Removing the variables helps prevent cases where another macro or control panel has instantiated the variable with a different data type or where the variable already has a value, but the value is incorrect.
You can remove the variables in several different ways. One way is to individually remove each
variable using the VAR_REMOVE[VN="variable"] macro
command. With this method, you add a line of code to remove each specific variable.
Example:
//	Remove individual variables
VAR_REMOVE[VN="length"]
VAR_REMOVE[VN="width"]
With this method, you keep track of which variables you declare in your macro, then remove each individual macro at the top of the macro file.
A new method for handling this is to use the VAR_REMOVE_LIST[LST="list"]
macro command. This method requires less coding than individually removing each variable, line
by line.
There are a couple of ways you can use this macro command. You can add each variable to the list.
Example:
//	Remove variables
VAR_REMOVE_LIST[LST="length,width"]
In this simple example, you can see that instead of having two lines of code to remove the two variables, it is done with one.
The best method is to use fact that the VAR_REMOVE_LST[] macro
command can use the * character as a wildcard. The * will match any string. So if you had
the variables: _length, _width, and area and you entered
"_*" as your LST="" parameter, the macro would match and
act on _length and _width, but would not see area as this variable
does not start with the underscore (_).
Knowing this, you prefix your macro variables with a unique character, for example, the underscore (_). Then, at the top of your macro, you use the wildcard to remove all the variables. The command will only remove the variables that start with your prefix, leaving the other variables intact.
Example:
//	Remove variables using wildcard
VAR_REMOVE_LIST[LST="_*"]

//	Define variables for this macro
DECIMAL:#_LENGTH 	// length of side
DECIMAL:#_WIDTH 	// width of block
The prefix can be any legal character or character string. You can use a single character like the underscore or a small string of characters. You cannot start the variable name with a number, even though you could use a number later.
Ensure you do not use more than the 12-character limit for variable names.
Also, remember that if you run several macros, you will want to use a unique prefix for each macro. If you used the same prefix, each macro would remove all the variables used by all the macros. This may not be a problem; if it is not an issue, you can use the same prefix for all of them. However, if your macro commands rely on some variables left behind by a different macro, make sure you have a unique prefix so they don't get deleted.
It might be tempting to use a wildcard as the list (VAR_REMOVE_LIST[LST="*"])
and remove all variables. This is what the VAR_REMOVE_ALL[] macro command
does. These commands will remove all variables, even if that variable is not intended to be
used in the macro you are writing.
There could be unintentional side effects to indiscriminately removing all variables. This style of variable management is not recommended.
Environment And Status
If your macro generates toolpath, you will likely want With Step to be
active. You don't want to generate toolpath on a layer.
If you need to force the new geometry to a specific Step, then use WITH_STEP[]
to set the Step. However, if you want to use the active Step when the macro is run, you
should first check and see if a Step or Layer is active. If a layer, display an error and exit.
Example:
//  Make sure STEP is active
//
IF (SNUM() = -1)
	//	layer active
	PAUSE[TX="A Step is required for this operation."]
ELSE
	//	Step active
	PAUSE[TX="STEP " + ITOA(SNUM()) + " is active."]
ENDIF
The macro function SNUM() returns either the current Step number or
-1 if Layers are active.
When used in the IF statement, you can check if a step is active. If not, it displays
an error. Otherwise, it displays the Step number in a message. The ITOA() function converts
the integer Step number of a string for output.
For more information on the SNUM() and ITOA()
macro commands, see the Status and String Manipulation sections of the Automation/Customization
- MCL Reference - Macro Functions reference.
If your macro generates layer geometry, you will likely want On Layer to be
active. You don't want to generate construction geometry as toolpath.
If you need to force the new geometry to a specific Layer, then use ON_LAYER[]
to set the Layer. However, if you want to use the active Layer when the macro is run, you
should first check and see if a Step or Layer is active. If a Step, display an error and exit.
Example:
//  Make sure LAYER is active
//
IF (LNUM() = -1)
	//	step active
	PAUSE[TX="A Layer is required for this operation."]
ELSE
	//	Layer active
	PAUSE[TX="LAYER " + ITOA(SNUM()) + " is active."]
ENDIF
The macro function LNUM() returns either the current Layer number or
-1 if Steps are active.
When used in the IF statement, you can check if a layer is active. If not, it displays
an error. Otherwise, it displays the Layer number in a message. The ITOA() function converts
the integer Layer number of a string for output.
For more information on the LNUM() and ITOA() macro commands, see the Customization
Guide. Expand the Automating SmartCAM with macros section and click on the Macro functions topic.
If your macro is going to create toolpath geometry using a user-selected Step, you will want to make sure that the active Step has the correct type of tool. For example, You wouldn't want to create facing geometry using a twist drill.
For this type of check you will need to open and close the JOS Context. For purposes of this example, think of a Step as a folder. Inside the folder (the Step) is all the information known about the tool and operation. Opening the Context is like changing into the folder. Then when you are finished you need to exit the folder, by closing the Context.
You must also know Jos Data Tags and the Job Operations Setup Section Numbers. JOS Data Tags are names for the properties you can access from a Step; they are like variables - they hold specific information about the Step. For example, the "ccw" data tag contains an integer that set to 0 for clockwise tool rotation and 1 for counterclockwise (or anti-clockwise). "dwellsec" is a decimal number for the number of seconds to dwell after hole and piercing operations.
To verify that you are using the correct tool type, you will need to check the tl_type data tag. This
tag returns a short string specifying the tool type using the Job Operations Setup Section Numbers
format.
The Setup Section Numbers is an organized, tree-like numeric string. Part of the numeric string specifies
the ID type, the category, and the actual item. As an example, an End Mill has the ID 2010101. Where
"201" means the ID is for Cutting Tools, the next two digits "01" means Milling tools. The
final digits "01" specify an End Mill.
Unique ID strings exist for operation data, job information, and tooling, as well as specific ID strings for milling, turning, fabrication, edm, and so forth. For your macro, you will need to find out exactly what information to check for.
The example macro will ensure that the active Step usings a Milling cutter, a Face Mill. The Setup
Section Number for this is 2010103.
Example:
//	Check that correct tool type is used
//
//	Variables
STRING:#tlSSN = ""		//	 Hold the Tool Type string

//	First make sure Step is active
IF (SNUM() = -1)
	//	Step isn't active. Display error and exit
	PAUSE[TX="A Step with a Face Milling tool is required."]
	GOTO(DONE)
ENDIF

//	Next, open the Step Context and get
//	tl_type string
//	BASEITEM=1 sets Step Context. USERNAME is string containing
//	Step to check. Checking active Step.
JOS_CONTEXT_OPEN[BASEITEM=1, USERNAME=ITOA(SNUM())]
	#tlSSN = JOS_STR(tl_type)
JOS_CONTEXT_CLOSE[]

//	Check return value and see if correct
IF (#tlSSN = "103")
	//	Correct Tool Type
	PAUSE[TX="Active Step is correct."]
ELSE
	PAUSE[TX="Active Step not using Face Mill."]
ENDIF

@DONE
For more information on working with JOS Contexts see the
Automation/Customization - Macro Development Fundamentals - Fundamentals:
JOS Information and KBM Library topic. Review the Using SmartCAM - Data
Tags and Section Numbers overview and child documents.
Text (ASCII) Files
Writing a text file from a SmartCAM macro is not hard. However, it can be a little confusing for novice macro writers, primarily when dealing with the Line formatting statement.
The following simple example shows how to open a Text file for writing, add text to the output file, and close the file when finished.
Example:
// Writing to a Text File
//
//	Variables
STRING:#OutputFile	//	where text written
STRING:#userInput		//	what to write
INTEGER:#loop = 1		//	keep looping or not? 1 = loop, 0 of exit

//	Will Open A File, Prompt user for Text to add to File
//	then add the text to the file. If user enters: exit as a single
//	word on a line, will close the file and exit.

//	Build output file path and filename.
//	Will output to the Temporary files folder
//	with filename TEST.TXT
#OutputFile = GET_TEMP_PATH() + "TEST.TXT"

//	Open the File for writing. First make sure you
//	are not overwriting something
IF (F_EXIST(#OutputFile) = 1)
	//	 File already exists. Error and exit
	PAUSE[TX="File: " + #OutputFile + " already exists."]
	GOTO(DONE)
ENDIF

//	Open the file for writing
F_OPEN[FN=#OutputFile, TY=quot;W"]

//	Make sure there was not an error opening the text
//	file.
IF (F_ERROR() > 0)
	//	There was an error. Display the text and exit
	PAUSE[TX="Error opening file: " + F_ERRSTR()]
	GOTO(DONE)
ENDIF

//	In a loop, prompt user for text. Save text to file
//	when user enters "exit" as single line, exit
WHILE(#loop = 1)
	PROMPT[TX="Enter Line of Text To Add to Text File\nEnter 'exit' to stop.", VN="userInput"]

	//	Make sure user entered text, just didn't hit return
	IF (STRLEN(TRIM(#userInput)) > 0)
		//	User entered text.
		//
		//	Make sure text isn't exit command
		IF (TO_UPPER(TRIM(#userInput)) = "EXIT")
			//	User wants to exit, set loop to zero
			#loop = 0
		ELSE
			//	Output string to text file
			F_WRITE[FN=#OutputFile, FMT="%S~n", VR="userInput"]

			//  Check for Write errors
			IF (F_ERROR() > 0)
			//	There was a file error
			PAUSE[TX="Error writing to file: " + F_ERRSTR()]
			GOTO(DONE)
		ENDIF
	ENDIF
ENDW

@DONE
//	Make sure the file is closed
F_CLOSE[FN=#OutputFile]
One of the first actions of this example macro is to build the destination path and filename
for the text file. The GET_TEMP_PATH() function returns a string containing the path to the TEMP folder
used by SmartCAM. The path always includes the closing path separator character. The macro concatenates the filename,
in this case, TEST.TXT, onto the end of the path.
Next, the macro checks to see if the file already exists. For this example, if the file exists, the macro displays an error message and exits. However, there are other options available to the macro writer. You could choose to append to the existing file, adding your contents to the end of the file. As the macro creator you could have opted to overwrite the existing file. You could have also chosen to either rename the existing file or select a new filename for our output text file.
The F_OPEN[] macro command is used to open the text file. The TY parameter tells the macro
command what you want to do with the file. The options are "W" which is to Write to the file; if the file
already exists, overwrite it. The option "A" tells File Open to Append to the file; to add new contents onto
the end of the previously existing file. The final option is "R" which stands for Read. This is used to read
content from a text file back into SmartCAM.
When working with files, the macro will need to check for any File I/O (input/output) related
issues after nearly each file command. The macro uses the F_ERROR() function to check for errors opening
the text file. If there was an error, it displays it and exits the macro. The F_ERRSTR() function
returns a string containing the error message.
Then, the main functionality of the macro is handled. The user is prompted to type in a text string inside a
loop. The PROMPT[] command is used to get the user input. The "\n" part of the prompt
string is a new line character or a carriage return. It allows two lines of text to be sent to the function using a
single string.
After getting the user-provided string, you need to test that a string was provided. Perhaps the user
accidentally accepted the prompt without entering a string. If the length of the string is greater than zero, then something
must have been passed in. The TRIM() statement removes any extraneous whitespace, such as spaces and tabs,
from both the start and end of the string.
Next, the macro tests to see if the "EXIT" command is used. If the user types in just the word, exit
the macro exits. To simplify testing, two commands are used: TRIM() to remove extraneous whitespace.
And TO_UPPER() converts the string to all Upper Case letters.
Converting to upper case simplifies the testing, as you otherwise have needed to test against "EXIT," and "exit," and "Exit,", and "eXit," and so forth. There is no guarantee how the user would capitalize the string. This forces it to be all upper case so you only need to test against "EXIT."
If the string "exit" is entered, the loop variable is set to zero, which causes the WHILE
loop to exit.
Otherwise, the user-entered string is added to the text file. This is handled with the F_WRITE[]
command. The command needs to know the path/name of the file, the output format, and the string to output. In
this case, the format statement, FMT, is configured to output a string and a new line character
(a carriage return). The format statement can handle more complex strings as needed.
And, to be sure there wasn't an issue, the macro checks for file errors.
As the macro exits, it closes the File using F_CLOSE[]. Always close the file when you are finished making
changes or reading from it.
For more information on the File Read/Write functions, see the File Handling section of the
Reference: Macro Functions topic. Review
the File Handling commands in the Reference:
Macro Commands topic. Information on the Path related functions, such as GET_TEMP_PATH() or
string manipulation functions, such as STRLEN(), TO_UPPER(), and TRIM()
are also located in the Reference: Macro Functions topic.
Reading from a text file in a SmartCAM macro is not difficult. However, some thought must be given to how you check for and handle reaching the end of the file.
The following simple example, shows how to open a Text file for reading, display each line of text from the file, and close the file when finished. The text file can be any regular ASCII text file; the text file created by the previous Writing to a Text File macro would work.
Example:
//	Read lines of text from file, Display lines with Line Number
//
//	Variables
STRING:#InputFile		//	File to read from
STRING:#OutputLine		//	Line of text to display
INTEGER:#LineNum		//	Line # of line just read
INTEGER:#ReadLoop = 1	//	keep reading from file

//	Will open a Text file and read one line at a time. Display
//	the line, then read to the next. Will end when the end of the
//	file is reached

//	Build path/filename to open and read
#InputFile = GET_TEMP_PATH() + "TEST.TXT"

//	Open the File for Reading. First, make sure
//	the file exists. If not display an error and exit
IF (F_EXIST(#InputFile) = 0)
	//	File does not exists
	PAUSE[TX="File: " + #InputFile + " does not exist."]
	GOTO(DONE)
ENDIF

//	File exists, so can attempt to open it
F_OPEN[FN=#InputFile, TY="R"]

//	Make sure there were not file errors opening the file
IF (F_ERROR() > 0)
	//	There was an error. Display message and exit
	PAUSE[TX="Error opening file: " + F_ERRSTR()]
	GOTO(DONE)
ENDIF

//	Loop through the file, reading a line at a time
//	display text and continue until end of file is reached
//
//	Check for End of File and set Loop value
WHILE(#ReadLoop = 1)
	//	Read the line of text
	F_READ[FN=#InputFile, FMT="%s", VR="OutputLine"]

	//	make sure End of File Not Reached
	//	If so, nothing left to process, exit loop
	IF (F_EOF(#InputFile) = 1)
		#ReadLoop = 0
	ELSE
		//	Check for Read Errors
		IF (F_ERROR() > 0)
			//	There was an error
			PAUSE[TX="Error reading from file: " + F_ERRSTR()]
			GOTO(DONE)
		ENDIF

		//	Get Line Number of line read
		#LineNum = F_LINE(#InputFile)

		//	Construct the Output message
		PAUSE[TX="Line: " + ITOA(#LineNum) + ": " + #OutputLine]
	ENDIF
ENDW

@DONE
//	Make sure the file is closed
F_CLOSE[FN=#InputFile]
One of the first actions of this example macro is to build the path and filename
for the text file to be read. The GET_TEMP_PATH() function returns a string containing the path to the TEMP folder
used by SmartCAM. The path always includes the closing path separator character. The macro concatenates the filename,
in this case, TEST.TXT, onto the end of the path.
Next, the macro checks to verify that the file exists. If the read file does not exist, an error is displayed and the macro exits.
The F_OPEN[] macro command is used to open the text file. The TY parameter tells the macro
command what you want to do with the file. The options are "W" which is to Write to the file; if the file
already exists, overwrite it. The option "A" tells File Open to Append to the file; to add new contents onto
the end of the previously existing file. The final option is "R" which stands for Read. This is used to read
content from a text file back into SmartCAM.
When working with files, the macro will need to check and see if there were any File I/O (input/output) related
issues after nearly each file command. The macro uses the F_ERROR() function to check for errors opening
the text file. If there was an error, it displays the error and exits the macro. The F_ERRSTR() function
returns a string containing the error message.
Then, the main functionality of the macro is processed. There are a couple of ways this particular task could be written.
The method used in this example is to create a loop. Read a line from the text file inside the loop and then check to see
if the End of the File (EOF) had been reached. The EOF is exactly what it sounds like - you've reached the end of the file;
there is nothing left to read. If the EOF is reached, the variable tested in the WHILE() loop is changed so that
the loop exits and the macro does not attempt to read beyond the end of the file.
If the EOF has not been reached, first, you check to see if an error was generated during the read. If so, display a message and exit. Then the final output string is created. It combines the line number, from the line just read, and the text from that line. This is presented to the person running the macro.
As the macro exits, it closes the File using F_CLOSE[]. Always close the file when you are finished making
changes or reading from it.
For more information on the File Read/Write functions, see the File Handling section of the
Reference: Macro Functions topic. Review
the File Handling commands in the Reference:
Macro Commands topic. Information on the Path related functions, such as GET_TEMP_PATH() or
string manipulation functions, such as STRLEN(), TO_UPPER(), and TRIM()
are also located in the Reference: Macro Functions topic.
Working With Strings
SmartCAM's FIND() and String
functions enable field data extraction from lines of text. One example would be to extract the SmartCAM Version #
to compare it to an in-line value to ensure your macro's users have the required functionality.
Perhaps to change how your macro completes a task based on the application version being run.
Example:
//	Get the version of the application that is running
STRING:#S1
STRING:#VER
INTEGER:#START
INTEGER:#POS
INTEGER:#END
INTEGER:#LENGTH

// The application header is in the format:
// application_name version platform build_date build_time
#S1=VERSION() // Returns the Application Header

// Use FIND() to isolate the location of the version
// First locate the space after the application name
#START = FIND(#S1, " ") // Search for the space character

// Now search for the next space, starting after the 1st space
#POS=#START+1
#END = FIND(#S1, " ", #POS)

// Need the length of the version string
#LENGTH=#END - #START

// We now have the positions of the two spaces surrounding the version
// Get the version
#VER = MID(#S1,#START,#LENGTH)

// The VER string is surrounded by spaces, remove them
#VER = TRIM(#VER)

// Display the version
PAUSE[TX="Version is " + #VER]
Running this macro would display a message box that looks similar to:
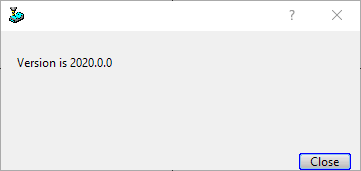
Where the version number shown would reflect the version of SmartCAM currently running.
The macro begins by using the version() macro command to return the version string for the
product you are running. The string returns looks like:
FreeForm_Machining 2026.0.0 Windows 10/24/25 04:35:42
The first section is the name program's name, and then the version number. Ending with the platform, in this case, "Windows". Lastly, the date and time strings for the product's last build. In this example, the macro will find the version string and extract it.
Once the version string is captured, the FIND() command is used to locate the 1st space
character in the string. This is the space between the product name and version number. The Find() function
returns the position in the string of the space. This index value is stored in the #POS
variable.
FIND() is called again, this time to locate the second space in the string, which marks
the end of the version number. A third parameter is passed to FIND() this time. This parameter is the
location in the string to start searching; it uses the #POS variable. Without this, FIND()
would start from the beginning of the string and just return the same index as the first time.
After finding the location of the start and end of the version number, the length of the version is calculated. This location actually is one character too long; because we are using the position of the location of the 2nd space character, not the end of the version number. This is handled later in the macro.
The MID() function extracts the version number from the version string and stores it in the
#VER variable. #MID() returns a substring, starting at a position (#START)
of #LENGHT length.
The TRIM() function removes any whitespace characters at the start or end of the string. And finally
the output dialog is displayed showing the captured version number.
Using FIND(), you can search strings from start to end. You could opt to use Reverse Find (
RFIND()) to search a string from end to beginning. The following shows how this can be used to
find a filename's extension.
//	Find extension of a file
STRING:#PATH
STRING:#EXT
INTEGER:#POS
INTEGER:#LENGTH

#PATH="C:\\ProgramData\\SmartCAM\\COMMON\\CODE\\CodeFile.nccode"	//  notice the non-standard extension

//  Use Reverse Find to locate the dot (period) before the extension
#POS=RFIND(#PATH, ".")

//  Calculate the length of the file extension
#LENGTH=STRLEN(#PATH) - #POS	// length of entire path, minus the extension

//  Extract the extension
#EXT=RIGHT(#PATH, #LENGTH)

//  Show results
PAUSE[TX="Extension is " + #EXT]
This macro would display a message box with the text: Extension is nccode
This macro initially establishes the path to search through; the hard-coded path is used here just for
simplicity. Next, RFIND() is used to search from the end of the path string to the start and
returns the string index position of the dot that separates the file name from the file extension.
The location is then converted into a length, the length of the file extension itself.
The RIGHT() substring function is called. It returns the #LENGTH number of characters,
from the string. It works from the end of the string to the beginning. This returns the file extension only
to the #EXT variable.
Finally the results are displayed. The concatenation operation (+) is used to join the
fixed text to the text of the variable containing the extension.